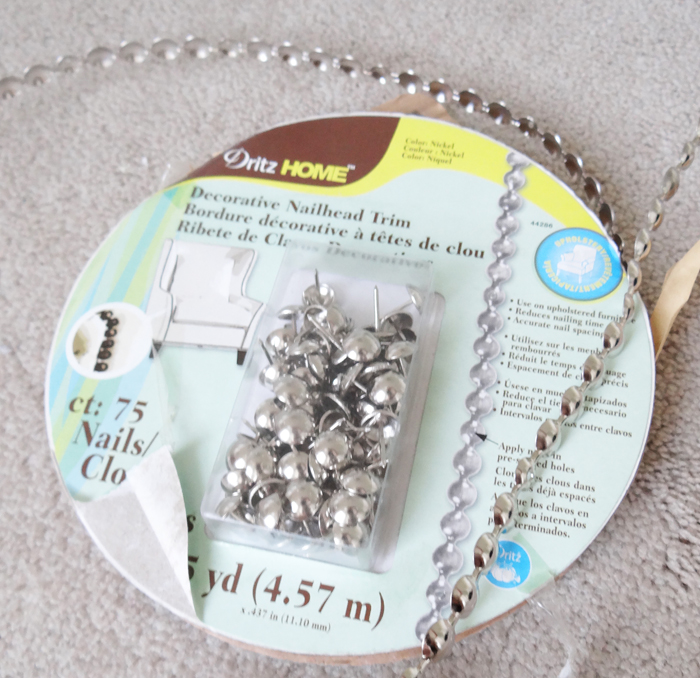
May 8 2013 - DIY Nailhead Trim Headboard Lovely Indeed. You cannot use a regular hammer since the metal head will destroy the delicate nailhead.
 Diy Upholstered Headboard With Nailhead Trim Update Home Sweet Ruby
Add Nailhead Trim to Headboard Arms.

Diy nailhead trim headboard. Lihat ide lainnya tentang kamar tidur yang indah kamar tidur biru kamar tidur kontemporer. We also added a product called Fray Check to the cut edges of fabric to keep them from unraveling. I looooove how it.
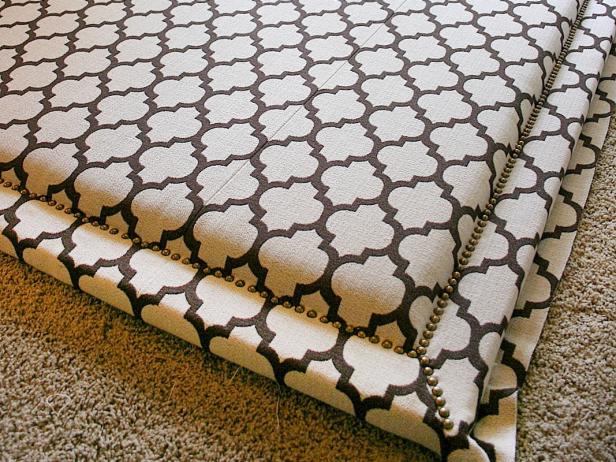
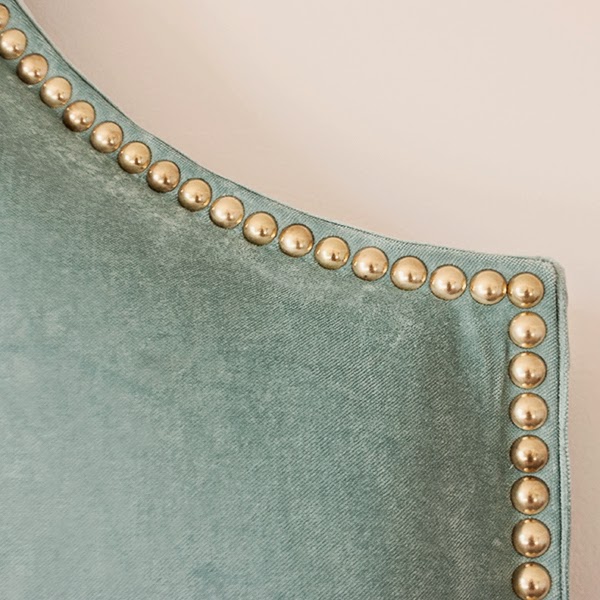
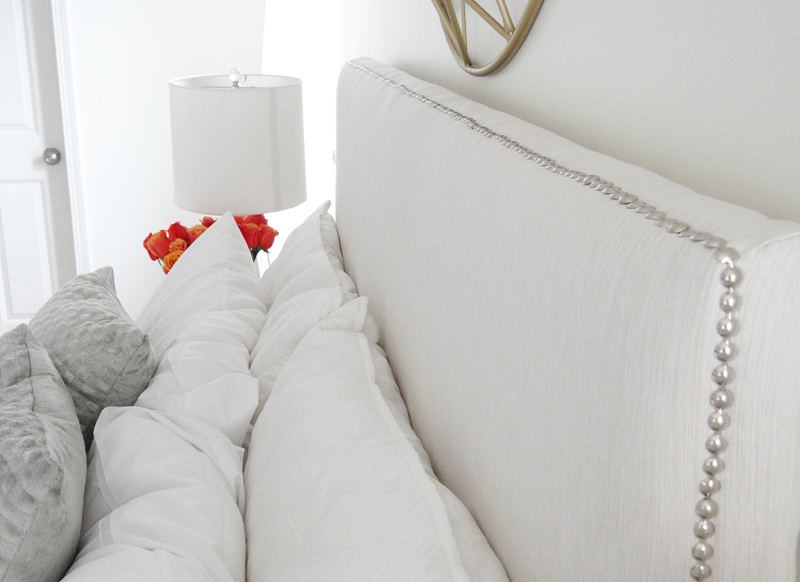
Step 3-Now nail the plywood to the 23s to secure the headboard together you can use a hammer and nails or a nailgun. Walk your nailhead trim around the headboard gently pounding in the nailheads with a rubber mallet. Then put on a couple of movies mark where you want all the nail heads to go I did them every 12 and go nuts.
Slowly start to drill making sure to not snag the fabric or foam with the screw. Be sure to staple the fabric in place around the mortise before cutting the fabric. Materials needed to build your own DIY upholstered headboard with nailhead trim ½ Plywood I used OSB cut to 60 X 34 plus some more scraps 1005I still have a enough left for another twin headboard or another project.
DIY Nailhead Trim Headboard. French Natural Nailhead Trim available at Joanns Fabrics eBay seller nails-to-you 850 DIY Upholstery Supply 15. If playback doesnt begin shortly try restarting your device.
Once its cut smooth out the top of the headboard with some sandpaper. 2 x 4 x 8 total 3 Cut to 2 54 2 57 759. 2017 Okt 1 - Jelajahi papan Nailhead Headboard milik Luciana Jasmine di Pinterest.
Place a screw through a washer and line it up with one of your pencil marks. Step 4- Now its time to make your headboard comfortable. I bought a full size foam mattress topper from Target for 20.
Remember my DIY upholstered headboard tutorial. I chose to use a trim kit that only required a nail every 5 spaces making life a lot easier. DIY Nailhead Trim - YouTube.
Not gonna lieit was a lot of nailing. Then you can take a jig saw or a reciprocating saw and cut along the pencil mark. Once the trim work was completed we cut open that areas that are mortised on the bottom of the headboard.
Start in the middle of the headboard. If you are doing a twin size headboard you can buy a twin size foam topper. Take a 1x6 piece of wood and place it UNDERNEATH the curved portion of your headboard.
In true slow poke fashion John and I finally got around to adding the nailhead trim that took our headboard out of plain Jane vanilla territory into the ohmygoshwhydidntwedothisearlier. Then you staple the upholstery tack strip in place arrow 1 and then fold the fabric over arrow 2 pull it tight and staple it in place at the back side of the headboard. Flip your headboard over in order to trim with nailheads.
You put down the fabric lay the cardboard Upholstery Tack Strip down over it and right aligned with the edgeside of the headboard. Push the screw down with the drill all the way to the wood if you can.
 How To Upholster A Headboard With Nail Head Trim How Tos Diy
 Gorgeous Shiny Things Weekend Project Diy Upholstered Headboard With Nailhead Trim
 Diy Fabric Headboard With Nailhead Trim Cuckoo4design
 Tufted Headboard With Nailhead How To Dorsey Designs
How To Make An Upholstered Headboard Diy Headboard With Nail Head Trim Youtube
 Diy Upholstered Nailhead Trim Headboard Popsugar Home
 Diy Drop Cloth Nailhead Trim Upholstered Headboard Tutorial Diy Headboard Upholstered Cloth Headboard Drop Cloth Headboard
 Diy Headboard Upholstered With Nailhead Trim
 Upholstered Headboard With Nailhead Trim Knockoffdecor Com
 Easy Diy Upholstered Headboard With Nailhead Trim Anika S Diy Life
 Diy Headboard Upholstered With Nailhead Trim
 My Decor Education Diy Headboard Upholstered Upholstered Headboard Headboard Tutorial
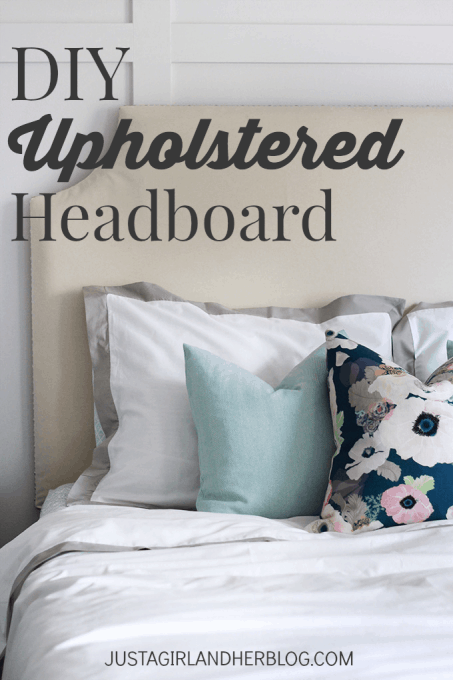 Diy Upholstered Headboard With Nailhead Trim Abby Lawson
Comments
Post a Comment